DetonatorXP Install Guide
version 3.0
Last Modified on 22-Feb-2003
WARNING: Many pictures - 56k users have patience please!
Also this guide is for English Only. Advanced Users will be able to change that easily.
Starting from 30.82 Nvidia packaged the drivers in a compressed format and also introduced
protection against NVStrap patch script.
However, by doing so they also made harder using the other patch scripts from RivaTuner, patches that
fix their bugs or improve the performance of Nvidia video cards.
The following guide will teach you how to create a “traditional” driver package and apply the patch scripts
using RivaTuner.
While it is written for WinXP the principles are the same for 98/Me, and you'll find the files needed for
those of you that still use those OSes.
Please note that this guide works for all post 30.82 drivers, even though the pictures are from the 40.71
driver installation.
Please make sure you are logged on with Administrative privilege.
1. Download the drivers from Nvidia site (or from another site/mirror/etc.- This guide works for
drivers downloaded from Windows Update too if you know how to save the *.cab file.)
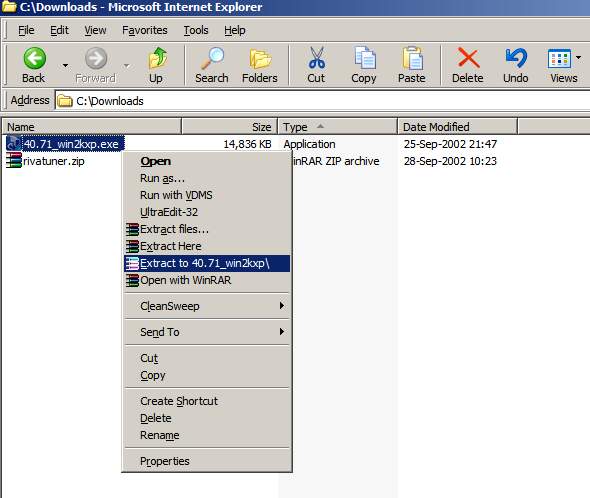
2. Using WinRAR extract the archive to a folder.
If you don't use WinRAR start using it: RARLabs.
Right click the file you downloaded and choose: Extract to a folder like in this example:
3. Download the file I created which suits your OS ( Operating System) and Detonator driver.
For Windows 98/ME: -----> 41.09
For Windows XP/2000: -----> 40.52
-----> 40.72
-----> 41.09
-----> 41.80
-----> 42.01
-----> 42.30
-----> 42.51
-----> 42.68
-----> 42.70
-----> 42.81
-----> 42.86
-----> 42.90
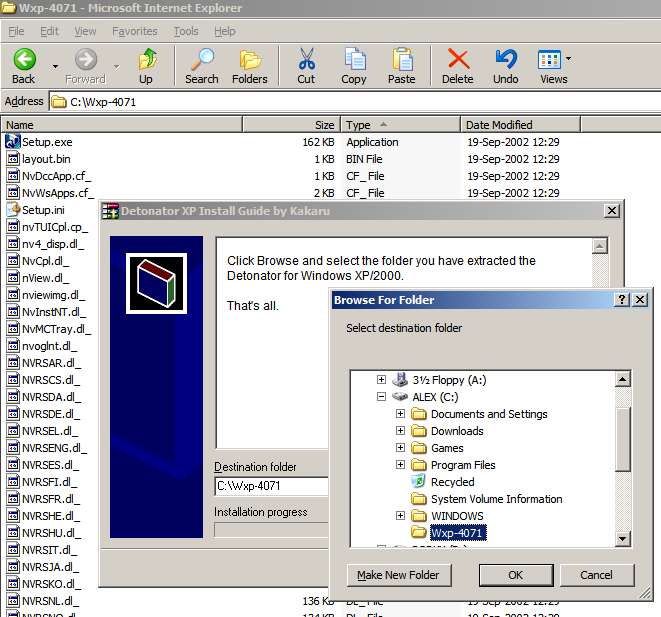
Simply run it and follow the on-screen instructions.
Browse for the folder you have created at the previous step. In my example the folder is Wxp-4071.
Note for Advanced Users: Extract the nv*.exe to a folder and modify the nv*.bat file in order to customize
it if you have a different language or just to see what does. Or get it here: NV98.bat and NVXP.bat.
4. Now your folder, Wxp-4071 in my example, should look like this:
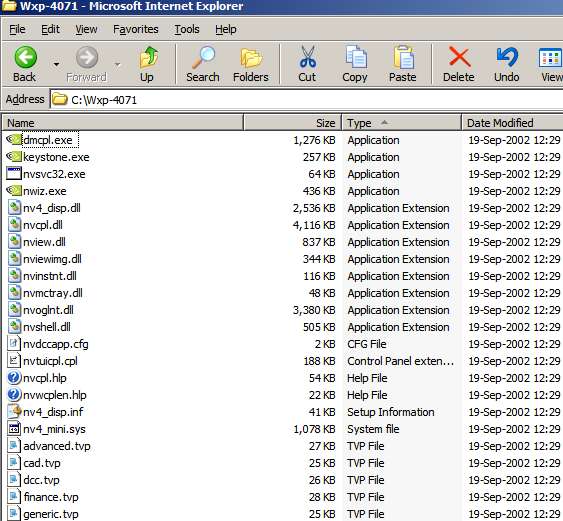
Congratulations, now you have a “traditional” driver from Nvidia.
You can now start to apply the patch scripts from RivaTuner.
If you don't have the best tweaker for Nvidia cards get it from Guru3d or NVWorld.
5. Open RivaTuner.
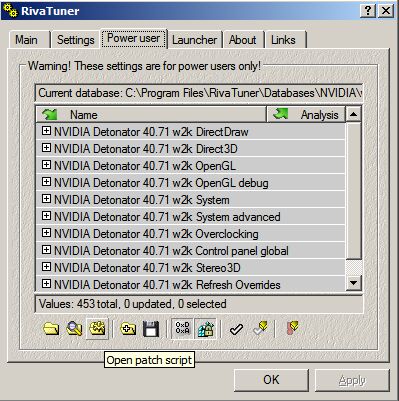
Press the “Open patch script” button (the 3rd in the row from left to right).
Choose Patch scripts first , then Nvidia.
Now the screen will look like this:
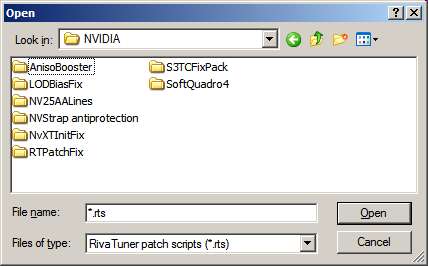
One can see 8 scripts. 6 come with RT RC12 and 2 are from SoftQuadro4.
* The NvXTInitFix, RTPatchFix and S3TCFixPack are obsolete for 40.xx timeframe, they are
being provided for completeness sake. So don't install these.
* The SoftQuadro4 patch is intended for GF4 cards only. And the NV25AALines is for
revisions A1 and A2 of GF4 too.
RivaTuner can be used to change your GeForce card into a Quadro onr, BOOSTING performance in
profesional applications. However, Quadro cards are slower in games than regular Geforce ones.
Warning: For GeForce 1/2/3 one need to install NVStrap driver in order to force GeForce into a Quadro.
For GF4, unfortunately, simply running the SoftQuadro4, even without NVStrap, will make the driver believe
it's a Quadro card, dropping performance in games.
DO NOT install SoftQuadro4 if you are a gamer or you don't use professional applications. I will not cover
its installation in this guide as my guide is NOT for CAD/Graphic designers.
So from 8 we are down to 3 patches. Let's proceed.
6. LODBiasFix Patch
This patch allows you to select negative values for LOD.
Click on LODBiasFix then choose your OS (Operating System).
It's LODBiasFix w2k.rts for Windows 2000/XP or LODBiasFix w9x.rts for 98/ME.
Click Continue and browse for the folder you put the files (Wxp-4071 in my example).
Press Open and you should get the following message:

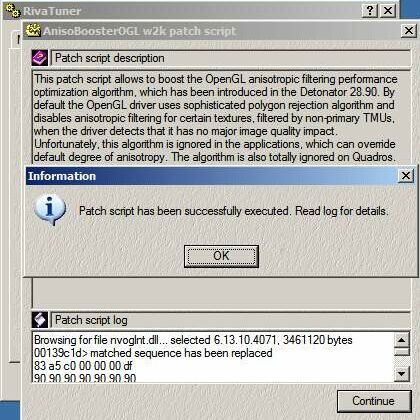
7. AnisoBooster.
The D3D patch will unlock D3D aniso optimizations for pre-GF4 cards.
The OGL patch will increase anisotropic performance in OGL. THIS is a MUST DO patch.
a) OGL patch. Select AnisoBooster then AnisoBoosterOGL w2k.rts for Win2000/XP
or AnisoBoosterOGL w9x.rts for Win98/Me. Then you wil be prompted to select the folder
where the driver is (Wxp-4071 in my example).
And this is what you get:
b) D3D patch. Select AnisoBooster then AnisoBoosterD3D w2k.rts for Win2000/XP
or AnisoBoosterD3D w9x.rts for Win98/Me.
Please note again that this patch is only for preGF4 boards.
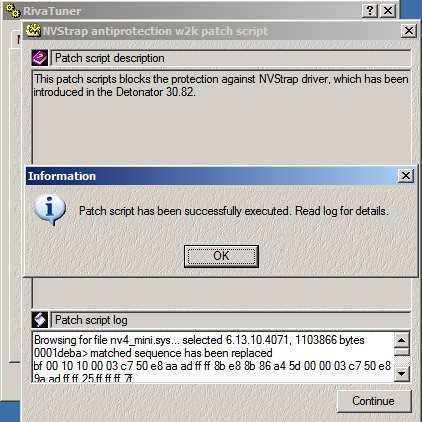
8. NVStrap antiprotection patch.
This patch allows you to use NVStrap driver. NVStrap allow you to change your AGP settings,
selecting Sidebanding or FastWrites. It can also be used to convert GeForce into Quadro.
Select NVStrapAntiProtection and then the file for you OS.
Browse for the folder the driver is. This is what you get:
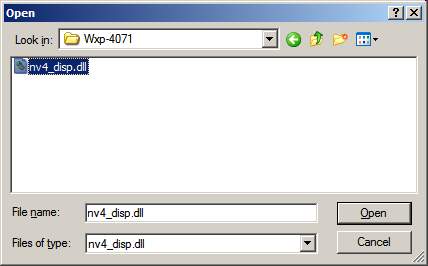
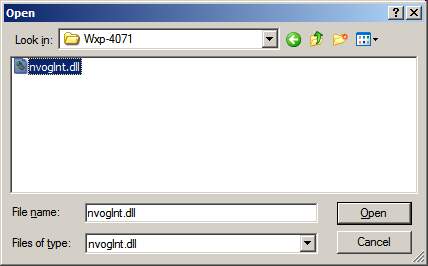
9. Delete from the folder (Wxp-4071 or whatever you called
it) the 3 .old files:
- nv4_disp.old
- nvoglnt.old
- nv4_mini.old
They are backups of original files, which you will never need again.
Now you’re set. You have a patched set of drivers. You now need to install them.
Note that you don't have to uninstall your previous drivers. Simply install the new one,
as they will overwrite any old file.
For Windows XP these are the steps:
10. Right click on desktop. Choose Properties. Then Settings- Advanced- Adapter- Properties-
-Driver-Update Drivers.
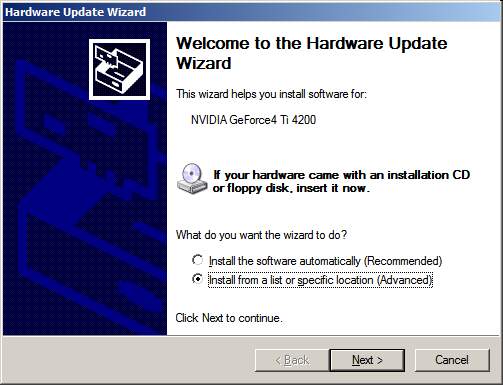
Next.
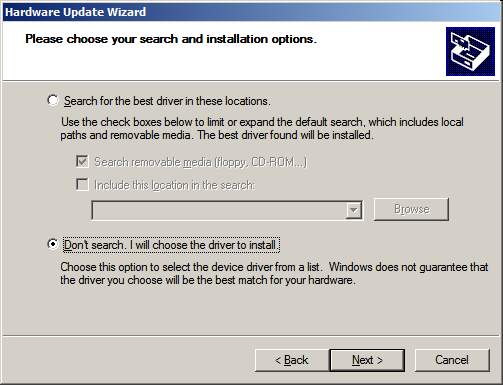
Next.
Click Have Disk then Browse and go to the folder you created. There choose nv4_disp.inf.

Reboot when asked and that’s all.
Alex aka Kakaru
Return home.